Instrukcja obsługi ConsoleCTI struktura programu/en: Różnice pomiędzy wersjami
(Utworzył nową stronę „=User interface= Application open in fullscreen by default. <center>Plik:ConsoleCTI - główne okno.png</center> =Application windows elements= == Title Bar == -...”) |
(→Right Panel) |
||
| (Nie pokazano 12 pośrednich wersji utworzonych przez tego samego użytkownika) | |||
| Linia 2: | Linia 2: | ||
Application open in fullscreen by default. | Application open in fullscreen by default. | ||
| − | <center>[[Plik:ConsoleCTI - główne | + | <center>[[Plik:ConsoleCTI - główne okno_en.png]]</center> |
=Application windows elements= | =Application windows elements= | ||
== Title Bar == | == Title Bar == | ||
| − | - shows the name of application, the minimize | + | - shows the name of application, the minimize button and program close button. |
| − | <br><center>[[Plik:ConsoleCTI - pasek | + | <br><center>[[Plik:ConsoleCTI - pasek tytułu_en.png]]</center><br> |
* 'Maximize' icon - allows to exit fullscreen mode and adjust the window size and position. | * 'Maximize' icon - allows to exit fullscreen mode and adjust the window size and position. | ||
| Linia 14: | Linia 14: | ||
== Menu Bar == | == Menu Bar == | ||
- There are three options available: Program, Contacts, Help. | - There are three options available: Program, Contacts, Help. | ||
| − | <br><center>[[Plik:ConsoleCTI - pasek | + | <br><center>[[Plik:ConsoleCTI - pasek menu_en.png]]</center> |
Each of the main positions contains submenus, drop down when you click on the text. | Each of the main positions contains submenus, drop down when you click on the text. | ||
| Linia 30: | Linia 30: | ||
* '''Help Submenu:''' | * '''Help Submenu:''' | ||
| − | ** Send Error Report - | + | ** Send Error Report - send a bug report to the Slican email address or other user-defined, with dump of active processes and work environment at the time of occurrence of the problem |
** Help - link to the Slican support page | ** Help - link to the Slican support page | ||
** About - general information about the program, version, license | ** About - general information about the program, version, license | ||
| Linia 43: | Linia 43: | ||
In some cases background changes color to red which indicates that application is processing some operations (data synchronization, connection problems, adding new contact or group) or connecting to PBX. | In some cases background changes color to red which indicates that application is processing some operations (data synchronization, connection problems, adding new contact or group) or connecting to PBX. | ||
| − | <center>[[Plik:ConsoleCTI - okno | + | <center>[[Plik:ConsoleCTI - okno stanu_en.png]] [[Plik:ConsoleCTI - okno stanu niezalogowany_en.png]]</center> |
'''Lines field'''<br> | '''Lines field'''<br> | ||
| Linia 59: | Linia 59: | ||
'''Channel Field'''<br> | '''Channel Field'''<br> | ||
| + | Channel field provides detailed information related to targeted connections to / from this channel, such as a name or number of the caller, dialed digits, the direction of the call, call transfer status, time of ringing or conversations, information about the last connection operated by the channel. | ||
| + | Depending on the configuration of PBX, channels can be displayed in three ways: | ||
| + | * as channels - if in PBX in Subscribers/Lines, tab Lna is set to '...with the occupation of the first free channel' channel list is displayed permanently and its state changes accordingly to traffic handling, | ||
| + | <br><center>[[Plik:ConsoleCTI - pole kanałów.png]]</center> | ||
| + | * as channels with history - if in PBX in Subscribers/Lines, tab Lna is set to '...with the occupation of the oldest occupied channel' channel list is displayed permanently and its state changes accordingly to traffic handling. After call ended the history of the last call stays on button, allowing for quick redial. Holding button on touchscreen or clicking right mouse button on this entry, allows us to add contact to phonebook. Information about last call is deleted after receiving another call on this channel or reserving it for outgoing call.Clicking on icon [[Plik:ConsoleCTI_-_nagranie.png]] allows us to play back recorded call on this channel. | ||
| + | <br><center>[[Plik:ConsoleCTI - pole kanałów - historia.png]]</center> | ||
| + | * as a list - only currently active channels are displayed. This option is available only after setting in ConfigMAN in Subscribers/Lines field Lna to 'Outgoing and incoming traffic with the occupation of the first free channel'. | ||
| + | |||
| + | |||
| + | ---- | ||
| + | |||
| + | === Right Panel === | ||
| + | '''Right panel''' has four tabs: Contacts, History, Phone, Book. | ||
| + | <br><center>[[Plik:ConsoleCTI - zakładki_en.png]]</center> | ||
| + | <br><br> | ||
| + | '''''Contacts Tab''''' <br> | ||
| + | Displays phone book contacts, allowing to personalize them. "Favourites' group is displayed by default, with assigned to it buttons. To select other group, expand the list and choose group that we are interested in. Each group can be personalized individually by moving each button to designated place. | ||
| + | <center>[[Plik:ConsoleCTI - Kontakty_en.png]]</center> | ||
| + | <br<br> | ||
| + | '''''History Tab''''' <br> | ||
| + | Shows call history of all channels programmed in CTS phone, which is logged into ConsoleCTI. Each record is one incoming or outgoing call assigned to Own Number or a channel. The information added to records, are: caller number and comment date and time of call, addiodional info about reaching or just dialed number and icon that shows if record is available for this call. | ||
| + | Additional icons are visible, informing about call state: | ||
| + | <br> | ||
| + | [[Plik:ConsoleCTI - zielona strzałka.png]] Green arrow means, that call has been answered <br> | ||
| + | [[Plik:ConsoleCTI - niebieska strzałka.png]] Blue arrow shows outgoing call (answered or not) <br> | ||
| + | [[Plik:ConsoleCTI - czerwona strzałka.png]] Red arrow shows missed call. Number by the arrow informs about missed calls number <br> | ||
| + | [[Plik:ConsoleCTI - nagranie.png]] This symbol shows if the call has been recorded <br> | ||
| + | |||
| + | In '''''History Tab'''''there is a possibility to search a call using filters. | ||
| + | <br><br> | ||
| + | '''''Phone Tab''''' <br> | ||
| + | This tab allows to dial the number using touchscreen or PC mouse. | ||
| + | <center>[[Plik:ConsoleCTI - Klawiatura.png]]</center> | ||
| + | <br><br> | ||
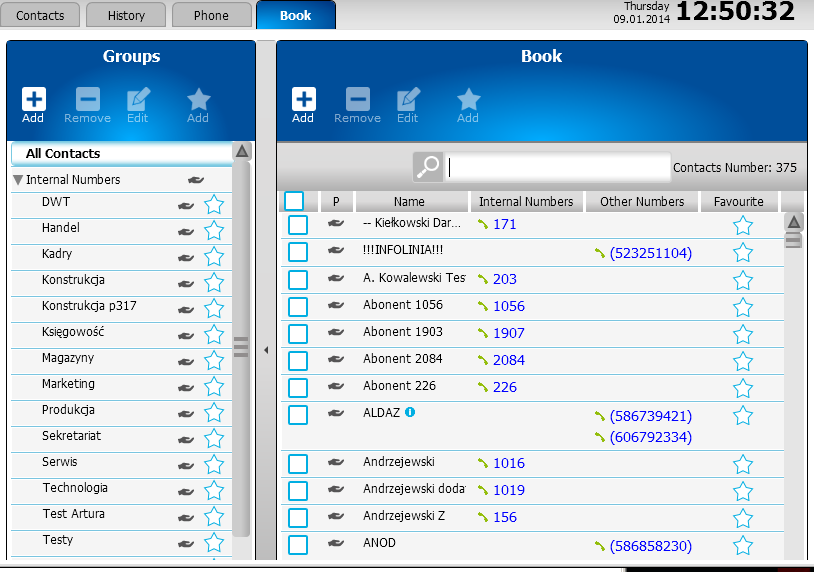
| + | '''''Book Tab''''' <br> | ||
| + | On the left side of this windows, Groups panel is visible, that shows to which group list belong numbers from phone book. ConsoleCTI user can add, edit or remove groups. If permissions to edit public book for current user are not set in ConfigMAN, changes that are made in ConsoleCTI will apply only to private book. On the right side of the window (Book) we will see aech contacts. To add specified contact as favorite, check star on right side off a contact. | ||
| + | <center>[[Plik:ConsoleCTI - Książka telefoniczna1.png]]</center> | ||
| + | <br> | ||
| + | [[Instrukcja_obsługi_ConsoleCTI/en |Return]] | ||
Aktualna wersja na dzień 11:54, 9 sty 2014
Spis treści
User interface
Application open in fullscreen by default.
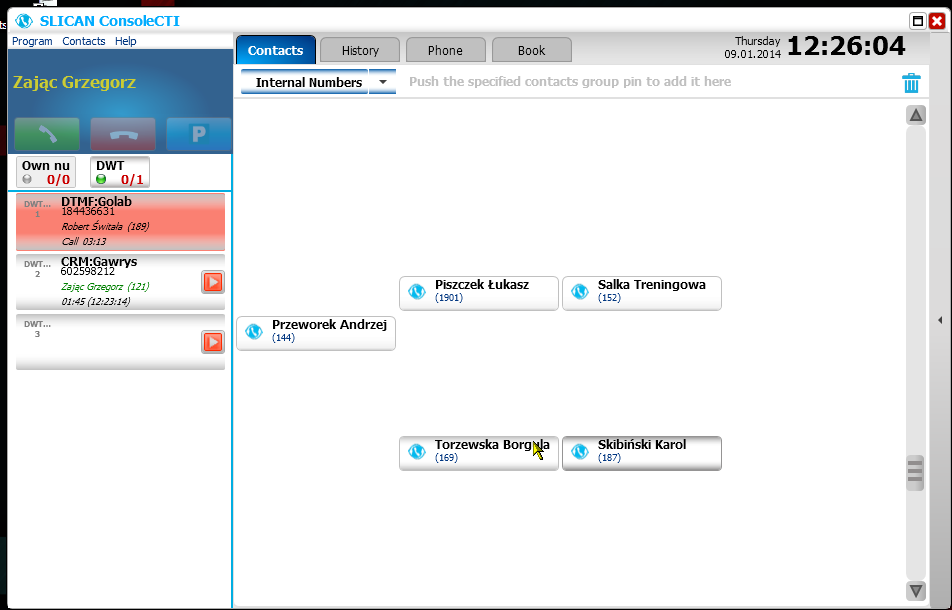
Application windows elements
Title Bar
- shows the name of application, the minimize button and program close button.
- 'Maximize' icon - allows to exit fullscreen mode and adjust the window size and position.
- 'Close" icon - closing the application
Menu Bar
- There are three options available: Program, Contacts, Help.
Each of the main positions contains submenus, drop down when you click on the text.
- Program Submenu:
- WebCTI – link to the the WebCTI application (accessible by web browser)
- Settings – access to configurable options of software
- Exit – closing the application
- Contacts Submenu:
- Add Contact - adding new contact to PBX phonebook. You can define contact name, up to five different types of phones, declare whether this number will be saved in your private or public book, select a group, or add additional information.
- Add Group - adding group to privet phonebook.
- Books - displays phone book in right panel.
- Lines - tab allowing to define lines displayed in the left panel.
- Help Submenu:
- Send Error Report - send a bug report to the Slican email address or other user-defined, with dump of active processes and work environment at the time of occurrence of the problem
- Help - link to the Slican support page
- About - general information about the program, version, license
Panels – left and right
Left Panel
Status window
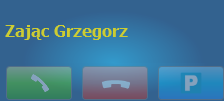
By default extension comment is shown on blue background in status bar with three action buttons that handle calls (green handset - answer call, red handset - hangup, P - parking call).
In case of answering incoming call or making a call, information about current call will be displayed in status window (caller number, call duration, name of channel which call is make).
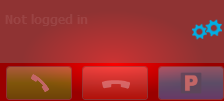
In some cases background changes color to red which indicates that application is processing some operations (data synchronization, connection problems, adding new contact or group) or connecting to PBX.
Lines field
Below the status window are buttons associated with 'Own Number' and declared by user Lines. They allow interactive work via a touch screen or mouse. Button Appearance - color of the lamp, color and behavior of the button, the numerical parameters - indicate the current status of the phone and call. Grey color indicates that at the moment line is inactive. Click to activate it - backlight in blue and change the lights to green. Numeral description indicates statistically the amount and direction of connections supported under the key. Digit on the left shows the number of active connections waiting for picking up for incoming and outgoing calls and calls parked. Right digit shows the number of calls currently supported.

- Buttons:
- Own number - by default, first on left - refers to a user's phone, which is logged to the application. When it is active, below 'channel field' displays the logged states of the system phone. It is possible to manage incoming and outgoing calls - receive, collate, park and transfer. If the service is not needed, it can be disabled in the Setting/Calls.
- Line - refers to lines added in the tab Contacts/Lines. Clicking on it will display channels associated with them.
If the button blinks red, that means it is inactive. Notifies the user of an incoming call on at least one of the channels associated with the programmed line. Its activation causes the opening below the Channel Field, and allows you to answer the call.
Channel Field
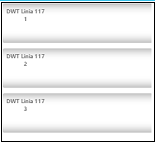
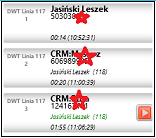
Channel field provides detailed information related to targeted connections to / from this channel, such as a name or number of the caller, dialed digits, the direction of the call, call transfer status, time of ringing or conversations, information about the last connection operated by the channel.
Depending on the configuration of PBX, channels can be displayed in three ways:
- as channels - if in PBX in Subscribers/Lines, tab Lna is set to '...with the occupation of the first free channel' channel list is displayed permanently and its state changes accordingly to traffic handling,
- as channels with history - if in PBX in Subscribers/Lines, tab Lna is set to '...with the occupation of the oldest occupied channel' channel list is displayed permanently and its state changes accordingly to traffic handling. After call ended the history of the last call stays on button, allowing for quick redial. Holding button on touchscreen or clicking right mouse button on this entry, allows us to add contact to phonebook. Information about last call is deleted after receiving another call on this channel or reserving it for outgoing call.Clicking on icon
 allows us to play back recorded call on this channel.
- as a list - only currently active channels are displayed. This option is available only after setting in ConfigMAN in Subscribers/Lines field Lna to 'Outgoing and incoming traffic with the occupation of the first free channel'.
Right Panel
Right panel has four tabs: Contacts, History, Phone, Book.
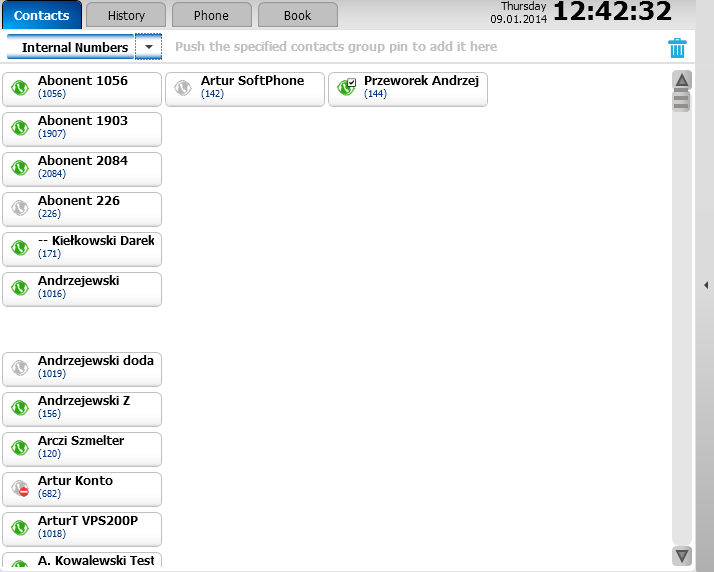
Contacts Tab
Displays phone book contacts, allowing to personalize them. "Favourites' group is displayed by default, with assigned to it buttons. To select other group, expand the list and choose group that we are interested in. Each group can be personalized individually by moving each button to designated place.
<br
History Tab
Shows call history of all channels programmed in CTS phone, which is logged into ConsoleCTI. Each record is one incoming or outgoing call assigned to Own Number or a channel. The information added to records, are: caller number and comment date and time of call, addiodional info about reaching or just dialed number and icon that shows if record is available for this call.
Additional icons are visible, informing about call state:
![]() Green arrow means, that call has been answered
Green arrow means, that call has been answered
![]() Blue arrow shows outgoing call (answered or not)
Blue arrow shows outgoing call (answered or not)
![]() Red arrow shows missed call. Number by the arrow informs about missed calls number
Red arrow shows missed call. Number by the arrow informs about missed calls number
![]() This symbol shows if the call has been recorded
This symbol shows if the call has been recorded
In History Tabthere is a possibility to search a call using filters.
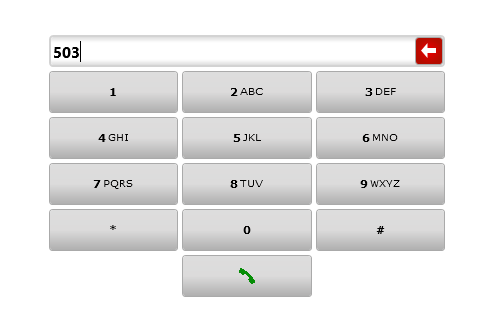
Phone Tab
This tab allows to dial the number using touchscreen or PC mouse.
Book Tab
On the left side of this windows, Groups panel is visible, that shows to which group list belong numbers from phone book. ConsoleCTI user can add, edit or remove groups. If permissions to edit public book for current user are not set in ConfigMAN, changes that are made in ConsoleCTI will apply only to private book. On the right side of the window (Book) we will see aech contacts. To add specified contact as favorite, check star on right side off a contact.
